

How to Connect Dual Catchmon: Common Problems & Solutions
Edited by Caroline Ryan | Apr 24, 2025 | Virtual Location
Playing Pokemon GO brings players a whole new experience and joy, allowing them to catch Pokemon, engage with other players, participate in world events, and more through virtual reality gaming. With that being said, it can comprehensively improve and make it more efficient to play the game. Players have opted for a device like Dual Catchmon that goes along with the Pokemon GO game to progress their game activity more legally. The said devices are called auto-catcher devices, which players integrate into their Pokemon GO venture to enhance their gameplay. They are mainly used for catching Pokemon and spinning PokeStops rewards; thus, many have bought them. Purchasing the device is one thing, but using it effectively without a connecting problem hinders Pokemon GO players from furthering their gaming.
Luckily, this guide provides a workable step in connecting Dual Catchmon to Pokemon GO. You will also have quick access to the device overview, common problems, why connecting issues occur, and workable ways to resolve them.
Contents:
Part 1. What is A Dual Catchmon?
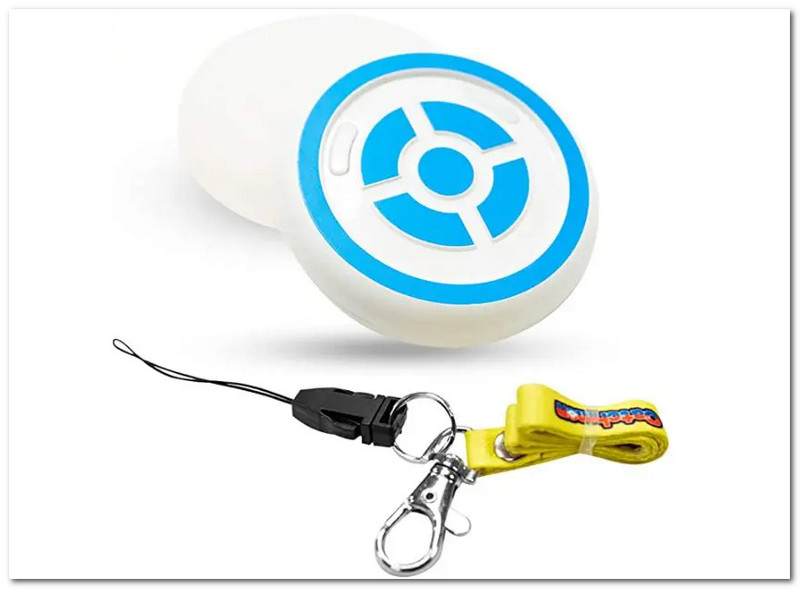
Megacom Dual Catchmon for Pokemon GO is an auto-catching keychain-like device with a triple-A Alkaline battery. Considered one of the most efficient devices for Pokemon GO gameplay, Dual Catchmon can store 2 Pokemon GO accounts to simultaneously auto-catch a Pokemon and spin a PokeStop reward. It features a built-in flash for easily notifying the user whether a Pokemon is nearby or PokeStop, making pressing the button unnecessary. Dual Catchmon can automatically do its function without the user doing anything.
Key Features
• 600 hours or 25 days of battery life use.
• One-click auto-connect, catch, and spin device.
• Easy to carry around device.
• No unnecessary apps are installed to make this work.
• The notification indicator can be customized.
Moreover, once users have fully set up and connected the Dual Catchmon to Pokemon GO, the device will automatically start working. As long as users are familiar with the light indicator, they will be able to understand its different meanings, including auto-catching and spinning of PokeStop rewards. Below are the light indicators to help you get started using the Dual Catchmon device.
| Light | Meaning | Sound Notification | Vibration Notification |
| Blue | Nearby to a PokeStop | None | None |
| Green | Pokemon is nearby | None | None |
| Yellow | A Pokemon that hasn’t been caught before is nearby | None | None |
| White | Catching the Pokemon | None | None |
| Ran out of item storage space | Three beeping sound | Three Vibration | |
| Red | The Pokemon runs away | None | None |
| Ran out of Pokeball | Three beeping sounds | Three Vibration | |
| Out of range of the PokeStop | Three beeping sound | Two Vibration | |
| Rainbow | Successful in catching Pokemon or PokeStop | None | None |
Part 2. How to Connect Dual Catchmon to Pokemon GO
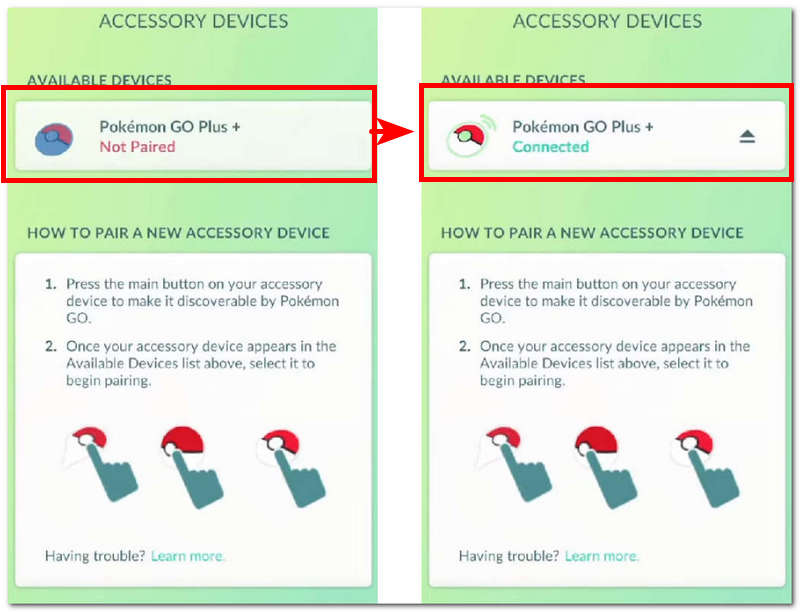
If your Dual Catchmon fails to connect when you pair it with your Pokemon GO account, be sure you are doing it correctly. If you are unsure about how to connect it, the following is the right way to connect it with Pokemon GO.
Step 1. Put a 2x Triple-A Battery to the Dual Catchmon device.
Step 2. Go to the Pokemon GO in-game setting to locate and connect the Dual Catchmon device: Pokeball > Settings > Connected Device and Services.
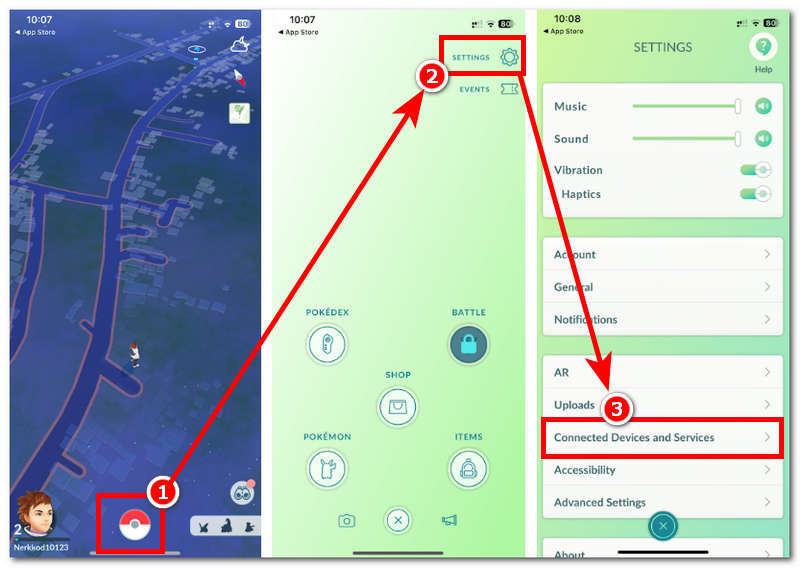
Step 3. Press any button on your Dual Catchmon device to turn it on and appear from the available devices.
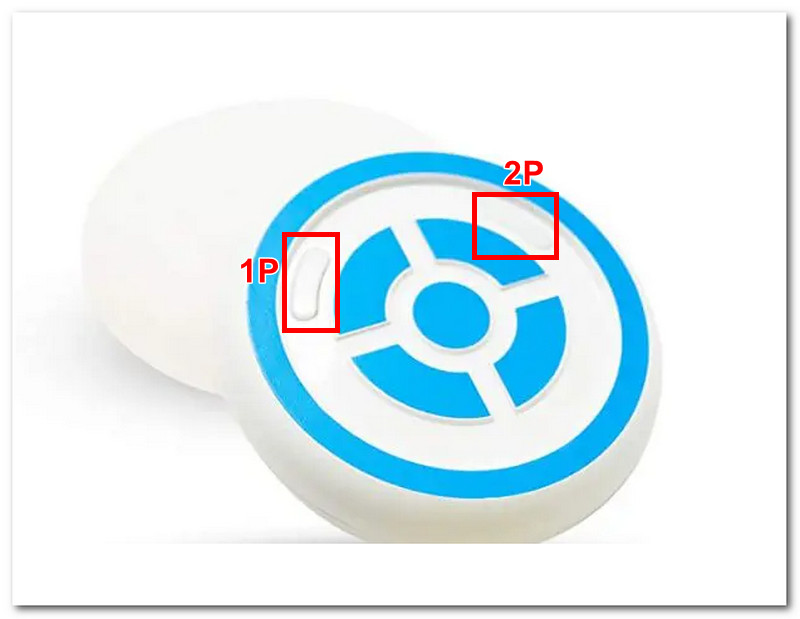
Note: If you want your device registered as 1P, tap the button on the left side of the Dual Catchmon. Otherwise, 2P is the button on the right side.
Step 4. Once it appears from the available devices, tap on it to coitdevice. Once you have done so, it will tell you it is connected.
Part 3. Why Dual Catchmon is Not Connected?
If your Dual Catchmon won't connect to your Pokemon GO account despite following the steps above, then it is possibly experiencing various problems. Below are some of the reasons that hinder you from pairing your Dual Catchmon device with your Pokemon GO.
1. Unstable Bluetooth connection. To resolve connectivity issues, be sure to check if your device's Bluetooth connection has been enabled. You may also try turning it off and back on to refresh the Bluetooth available devices.
2. The device has a low battery. If your Dual Catchmon has run out of battery, then it may show signs of connectivity issues, or it may not appear on your Pokemon GO list of available devices to pair with. To resolve this, try changing its battery with a new one.
3. Connected to the previous account. As the device can be used for two Pokemon GO accounts, one reason it keeps failing to connect with your account is that it is still connected to the other account. To resolve this, be sure that you are using the right setting, whether for the P1 or P2 account.
4. Dual Catchmon and your mobile device are far apart. Distance between the two devices matters when connecting, and if you attempt to pair your Dual Catchmon device with your mobile, it will most likely not connect. To resolve this, be sure to keep your Dual Catchmon and mobile device close when pairing.
Part 4. How to Fake Your Location in Pokemon GO
If you are in a situation where Dual Catchmon is not connecting, no matter what troubleshooting you try, it is safe to assume that the device is broken. While it appears unusable for you to progress your Pokemon GO gameplay, we have found another method to make your life easier. Using a third-party tool like AnyCoord, you can visit other PokeStop and Gyms far from your location without leaving your homes. AnyCoord simply does this by allowing you to change your location in Pokemon Go. Thus, it temporarily lets you use a virtual location to progress your game activity.
Other features you can use with AnyCoord while playing Pokemon GO are that it can help you earn Adventure Sync Rewards and fasten the hatching process of your Pokemon Egg. The tool can simulate realistic movement, making it look like your Pokemon GO account is acting in certain areas, thus making Pokemon GO count as steps. Furthermore, to get started faking your Pokemon GO location using the AnyCoord tool, kindly follow the steps below.
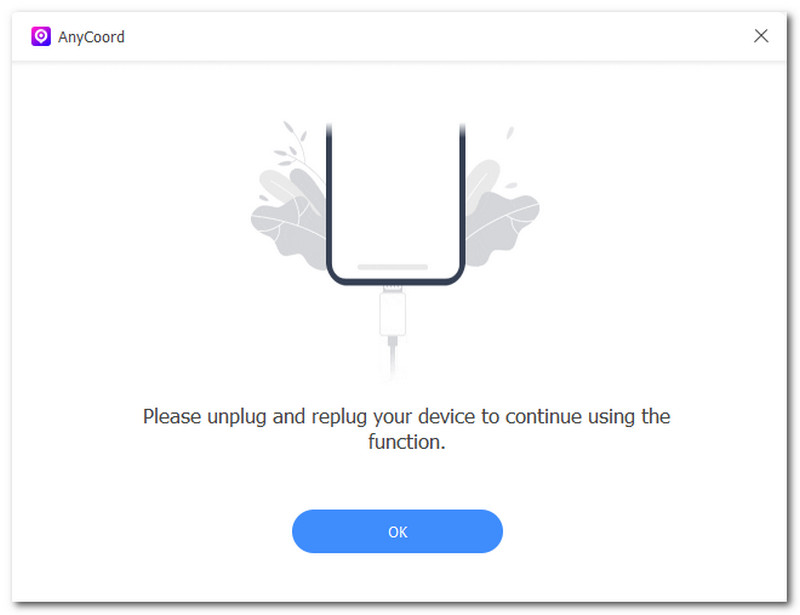
Step 1. Download the AnyCoord software to your (Mac or Windows) devices. Before opening the software, connect your mobile device to your desktop via a wired connection.
100% Secure & Clean
100% Secure & Clean
Step 2. Once you connect your mobile device, proceed to open the Anycoord software. From its user interface, click on the Modify Location mode to fake your Pokemon GO location.

Step 3. Once you select the Modify Location mode, use the search bar functionality to search for a location you want to use in your Pokemon GO. Once you have put your virtual location, you may click the Modify button to fake your Pokemon GO location.

As you can see, AnyCoord is so powerful and efficient in helping you change your location, whether you want to change your location on iPhone or on Android.
Part 5. FAQs about How to Connect Dual Catchmon
-
1Can I connect two accounts at the same time?
Yes, as the device's name suggests, it can be a dual connection to two Pokemon GO accounts, making it easier to progress between them in one go.
-
2Can I update the firmware of my Dual Catchmon?
No, it doesn’t have a built-in feature for firmware updates. The device is a plug-and-play device, so such an update is unnecessary. Thus, there is no legal way unless the user opens up and tweaks the device.
-
3How long do the batteries last?
The Dual Catchmon device runs on a replaceable triple-A battery, and its approximate life is about a week or so, depending on how frequently you use it, whether less than a week or more than a week.
Conclusion
This guide has shown straightforward steps on how to properly connect your Dual Catchmon device with your Pokemon GO. While doing it may appear easy, there is still a possibility of error, which can hinder you from using the device. This guide not only shows an overview of the device and steps in connecting it with Pokemon GO, but it also lists some common indicators of why such a problem occurs when connecting. Thus, a quick troubleshooting is also included with each root cause.


AnyCoord is the best tool to change, hide, or spoof your location in games, social media apps, and other apps on iPhone or Android devices.
100% Secure & Clean
100% Secure & Clean