

How to Add a Location on Instagram Using Custom Locations
Edited by Caroline Ryan | Aug 29, 2024 | Virtual Location
Instagram is perhaps the most famous social media site today since it is focused on sharing images and videos, making it a perfect option for users who want to share their experiences online. Although this method can be done on Facebook, Twitter, and similar social media sites as well, Instagram is optimized for sharing these types of posts since the site was made for image sharing since its development. With that in mind, sharing the location where your image was taken is another way of adding details to your post. Due to this useful detail, this article will be used to provide our readers with the best ways how to add a location on Instagram posts. We will explore the different steps on how to add normal locations and addresses, how to add creative locations that do not exist, and how to create custom locations on your own. To learn more about these Instagram locations, please continue reading the article down below.
Contents:
Part 1. How to Add a Location on Instagram
Before proceeding to the advanced options on how to add location on Instagram, let us first provide the basic way of adding location on Instagram posts before sharing them online. Afterward, we will explore the advanced options of adding a creative location that does not exist, and the guide to add custom location on your own Instagram posts.
If you are interested in posting large videos on Instagram, learning how to compress videos might interest you.
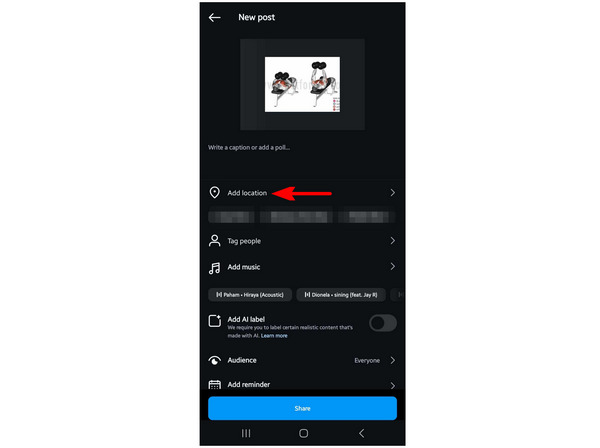
Step 1. Open Instagram and create a new post by clicking on the corresponding Create Post button.
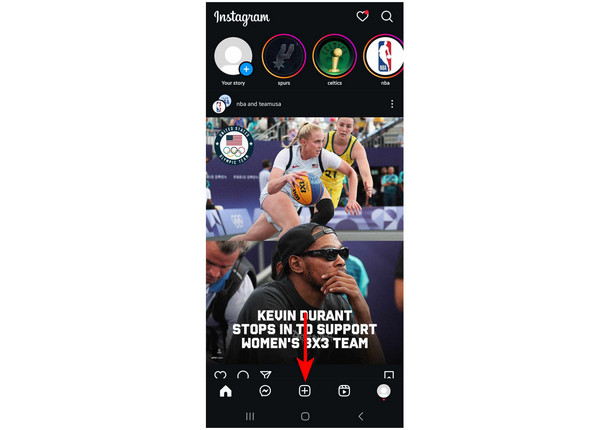
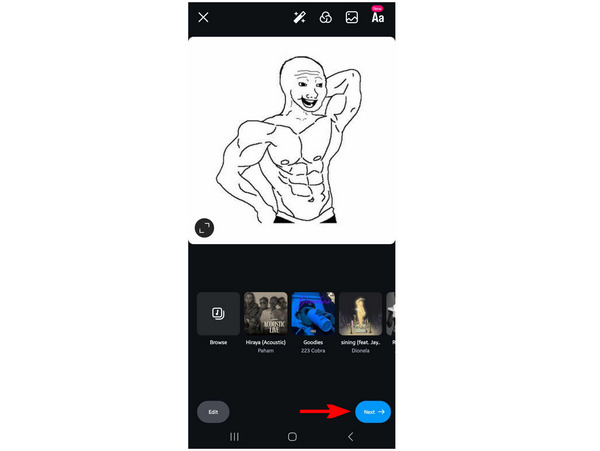
Step 2. Edit the image or video you want to share. Once your desired adjustments are added, click on Next. This section is also where you can add video filters on Instagram.
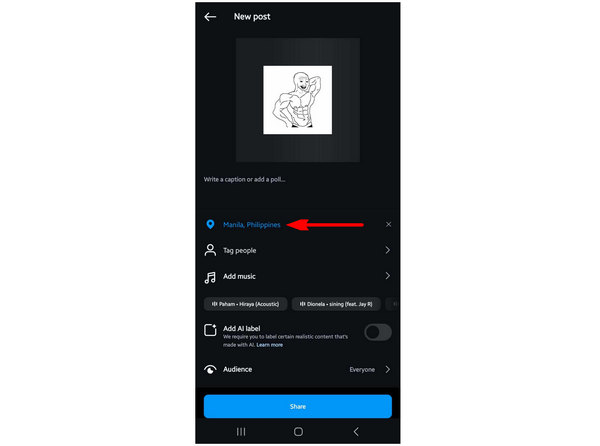
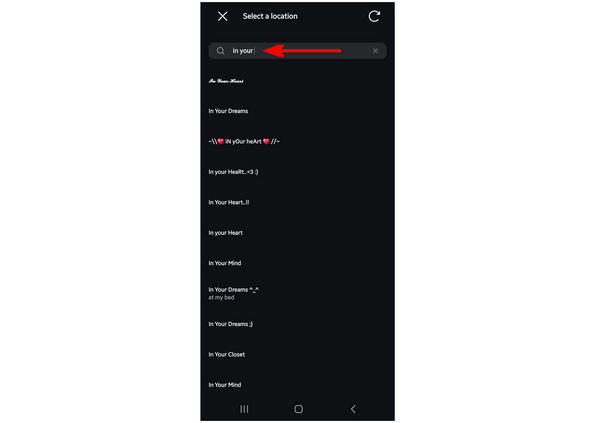
Step 3. Click on the Add Location button to add the said detail to your post. In the next window, search for the location that you want to add.
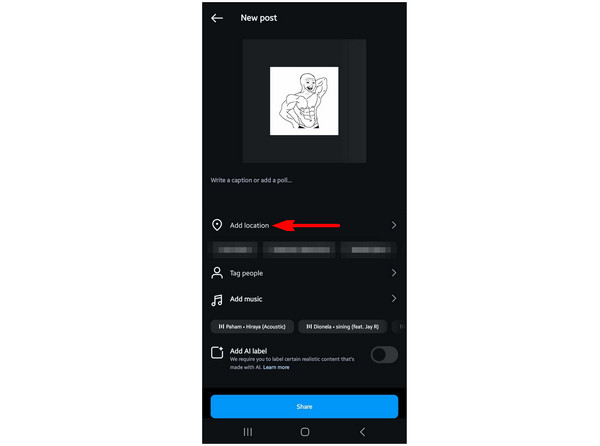
Step 4. Once the location has been set, simply click on Share to add your post on Instagram.
Simply follow these four steps to add locations to your Instagram posts. The steps presented in this guide are quite similar if you want to learn how to add a location to an Instagram Story.
How to Change Location on Instagram Posts
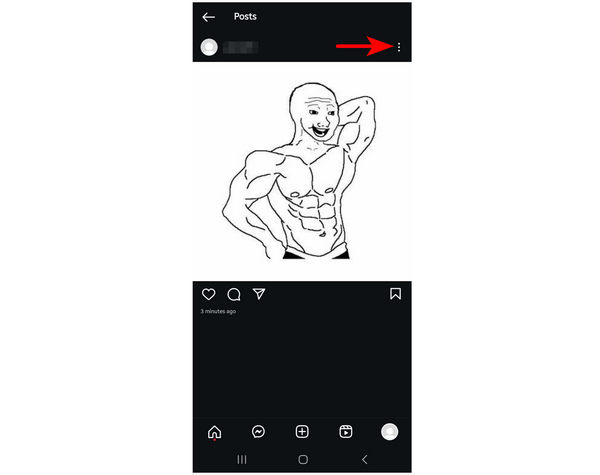
Step 1. Go to the post you want to edit and click on the Three Dots in the upper right corner.
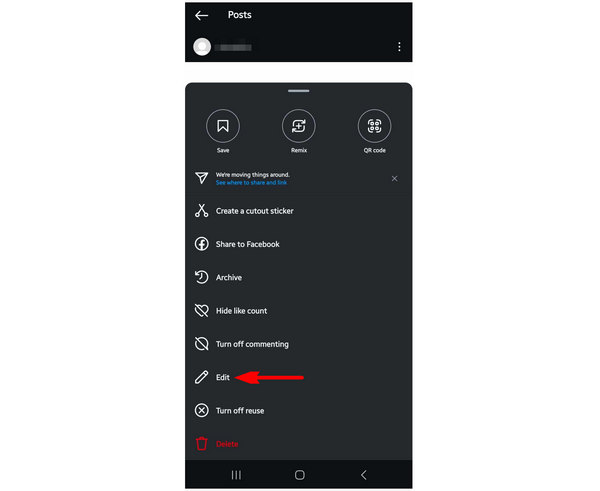
Step 2. In the menu that will pop up, tap Edit.
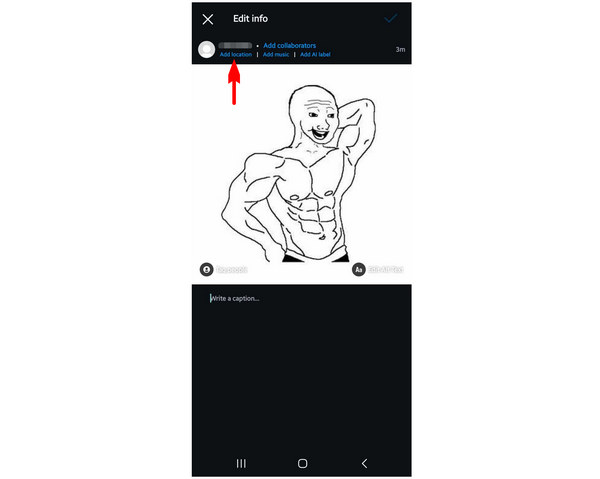
Step 3. In the post-editing window, click on Add Location. In the next window, search for the location you want to use. Then, tap the Check Button once a location has been set.
If you want to change the location in an existing post, simply follow this short and simple guide.
How to Add a Location on Instagram that Doesn't Exist
Step 1. Once you have added an image to the Instagram posting process, click on Add Location.
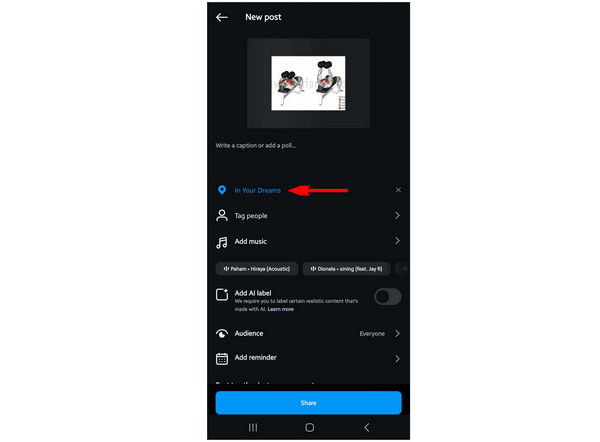
Step 2. When finding a location, write a custom location that does not exist.
Step 3. Once the custom location has been added, tap on Share to post the image with the customized location.
Please read the guide below if you want to learn how to create these custom locations yourself.
How to Add Custom Location on Instagram
Step 1. Open Facebook and tap What’s on your mind to create a new post. Then, tap on Check-In in the next window.
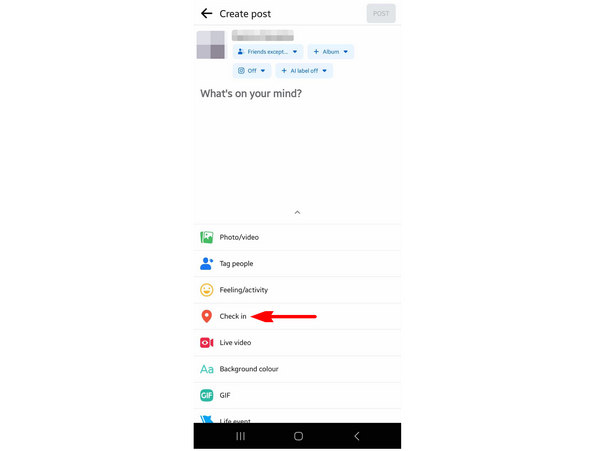
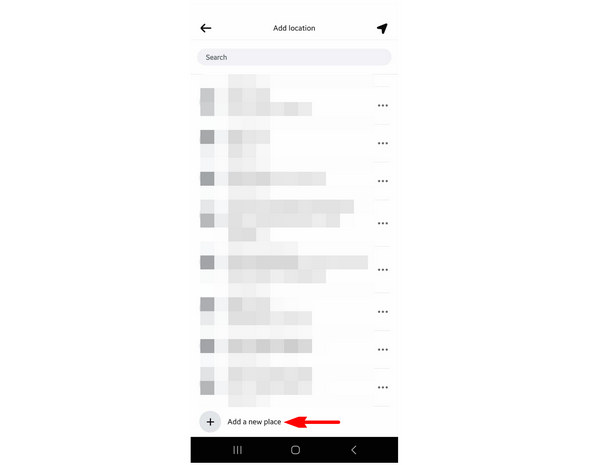
Step 2. Scroll down below and then click on Add a new place.
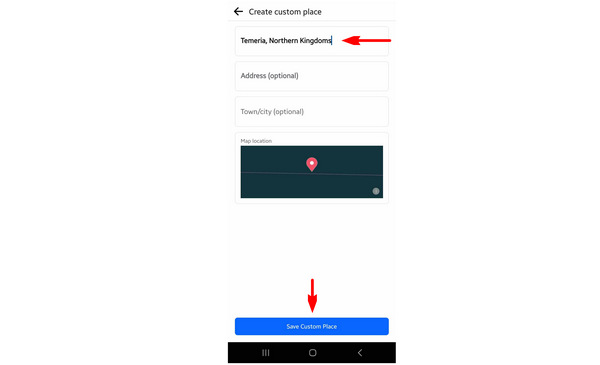
Step 3. Inside the Create a Custom Place window, type the name of the custom place on the Place Name box. You can also add an address and town or city, but they are optional. Select Save Custom Place to confirm the new location.
Once Facebook has accepted the custom place, you can now go back to Instagram where the custom place can now be used. You don’t have to post the Facebook post that you created, and you can discard it safely. If you want to learn how to add a location to your Instagram profile, you can follow the mentioned steps to add a custom location that you can share on your Instagram profile bio.
Part 2. How to Create a Location on Instagram By Changing Device Virtual Location
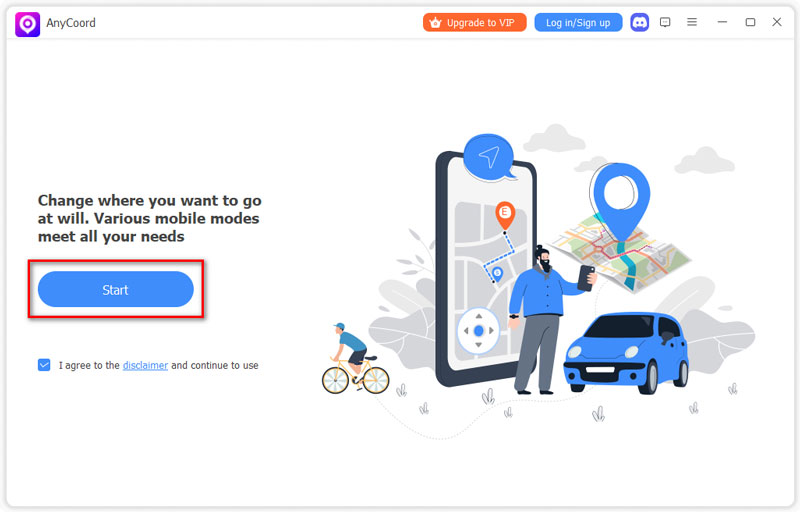
After following our guide above, this section of the article will be used to teach you how to add custom locations on Instagram by using a more protected virtual location changer. This alternative is a safer step to use since it will protect your device’s real location from Instagram’s location settings. Without further ado, this software is none other than AnyCoord Location Changer - a powerful virtual location setter ideal for users who want to protect personal data online.
As its name suggests, this tool is software that you can use to cover the location of devices connected to it by using a reliable server that can modify the virtual location of your phone. With the help of this software, you can protect your real-world location when chatting with strangers online, especially since social media sites, such as Instagram, can now be accessed by anyone in the world. This is a valuable asset to keep your privacy safe which is a prime commodity in the modern age.
If you want to enjoy increased virtual protection from strangers and data brokers online, simply use AnyCoord Location Changer to browse your favorite social media sites safely.
Download the software first and then follow our three-step guide below to learn how to use AnyCoord Location Changer.
100% Secure & Clean
100% Secure & Clean
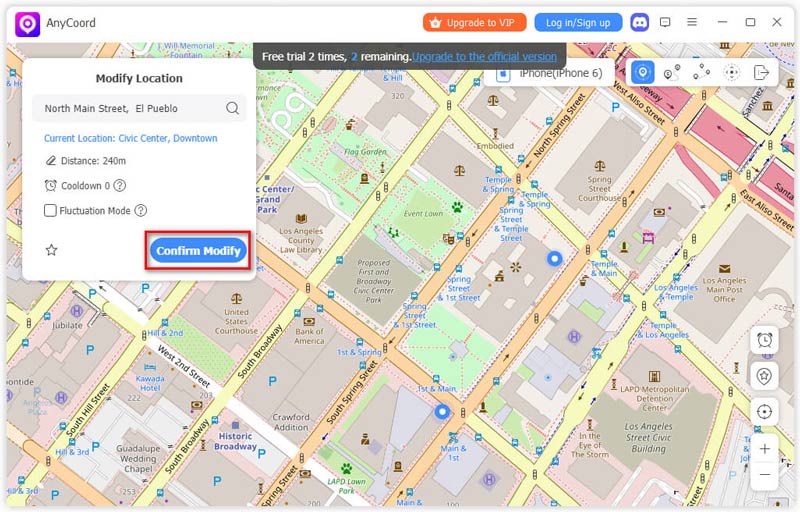
Step 1. Connect your mobile device to your computer using a USB cable. Once it is connected, click Start in AnyCoord Location Changer.
Step 2. In the location changer window, choose the Modify Location mode.
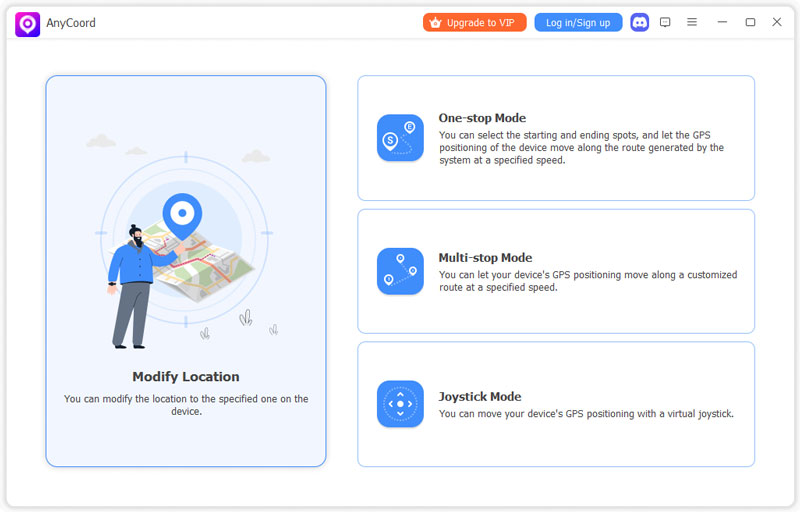
Step 3. Control the map by point-and-dragging to navigate and find the area that you want to use. After finding the spot that you want to set as your virtual location, simply click on it. Then, select Confirm Modify to confirm your location selection.
By following these steps, you can now post your favorite photos on Instagram without worrying about sharing your real location. This is a smart security measure for users who are concerned about sharing their data online.
Conclusion
Now that we have provided you with different steps for adding a location on Instagram, we hope that this article has proven useful for your needs. However, suppose you are still concerned about your security when using custom areas on Instagram. In that case, you can always use AnyCoord Location Changer for a more protected way of adding custom Instagram locations.
Please share this article online to help other Instagram users.

AnyCoord is the best tool to change, hide, or spoof your location in games, social media apps, and other apps on iPhone or Android devices.
100% Secure & Clean
100% Secure & Clean